Unit 1Big Ideas
Rigid Transformations
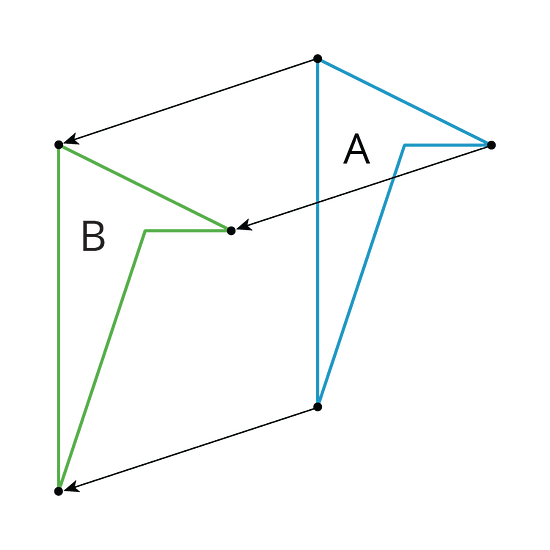
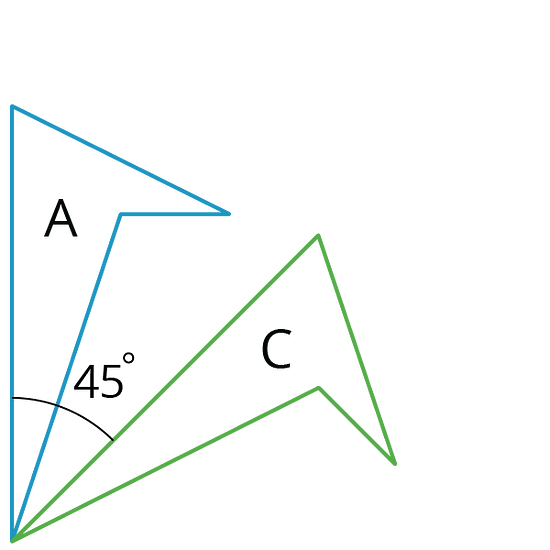
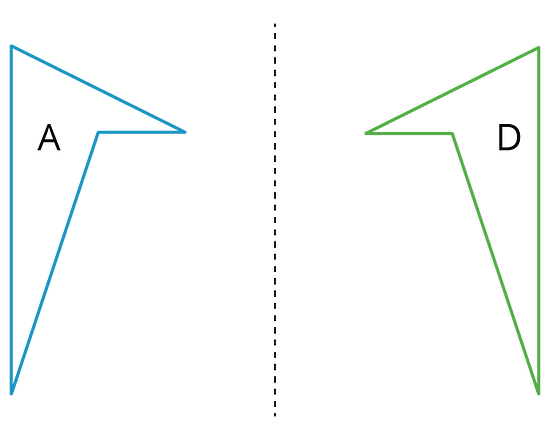
This week your student will learn to describe the movement of two-dimensional shapes with precision. Here are examples of a few of the types of movements they will investigate. In each image, Shape A is the original and Shapes B, C, and D show three different types of movement:
Students will also experiment with shapes and drawings to build their intuition by:
- cutting shapes out
- tracing shapes on tracing paper to compare with other shapes
- drawing shapes on grid paper
- measuring lengths and angles
- folding paper
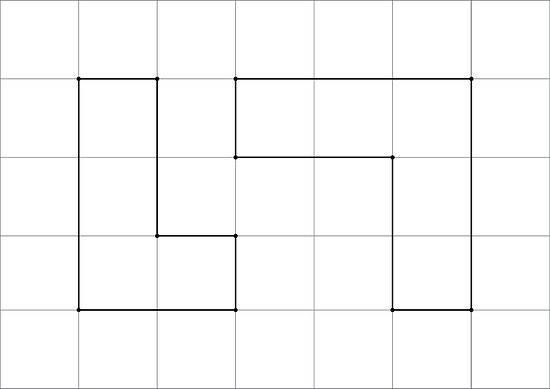
Here is a task to try with your student:
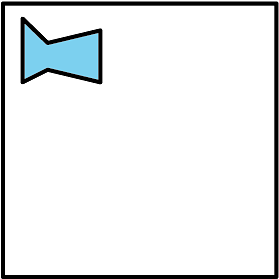
- Describe how the shape changes from one panel to the next.

- Draw a fourth panel that shows what the image would look like if the shape in the third panel is rotated 180 degrees counterclockwise around the middle of the panel.
Solution:
- Turn it 90 degrees clockwise then move the shape to the right side.
-
Properties of Rigid Transformations
This week your student will investigate rigid transformations, which is the name for moves (and sequences of moves) that preserve length and angle measures like translations, rotations, and reflections. For example, in this image the triangle was reflected across the line and then translated to the right and up slightly.
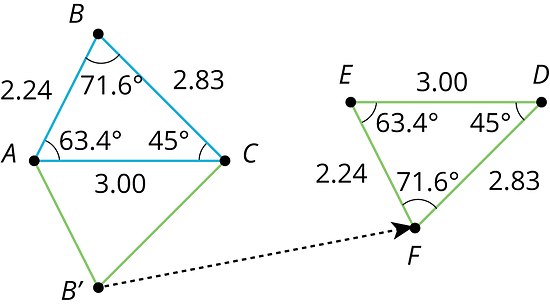
When we construct figures using rigid transformations, we know that the measures of the images of segments and angles will be equal to the measures of the original segments and angles.
Here is a task to try with your student:
- Reflect triangle across side to form a new triangle .
- What is the measure of angle ?
- Name two side lengths that have the same measure.

Solution:
-
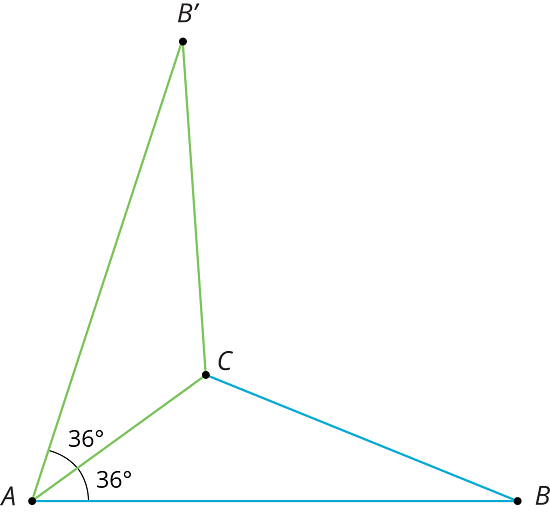
- 36 degrees. Angle corresponds to angle .
- Sides and have the same length as do sides and .
Congruence
This week your student will learn what it means for two figures to be congruent. Let’s define congruence by first looking at two figures that are not congruent, like the two shown here. What do these figures have in common? What is different about them?
If two figures are congruent, that means there is a sequence of rigid transformations we could describe that would make one of the figures look like the other. Here, that isn’t possible. While each has 6 sides and 6 vertices and we can make a list of corresponding angles at the vertices, these figures are not considered congruent because their side lengths do not correspond. The figure on the left has side lengths 3, 2, 1, 1, 2, 1. The figure on the right has side lengths 3, 3, 1, 2, 2, 1.
For the last part of this unit, students will use the congruence to investigate some interesting facts about parallel lines and about the angles in a triangle.
Here is a task to try with your student:
- Explain why these two ovals are not congruent. Each grid square is 1 unit along a side.
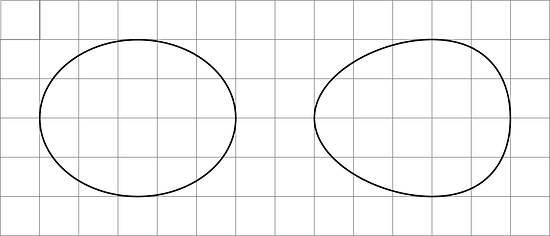
-
Draw two new ovals congruent to the ones in the image.
Solution:
- While each oval has a horizontal measurement of 5 units and a vertical measurement of 4 units, the oval on the left’s “tallest” measurement is halfway between the left and right sides while the oval on the right’s “tallest” measurement is closer to the right side than the left side.
- There are many possible ways to draw new ovals congruent to the original two. If a tracing of the original oval lines up exactly when placed on top of the new image (possibly after some rotation or flipping of the paper the tracing is on), then the two figures are congruent.